

Lentil and Vegetable Soup: A Clear Method from the First Chop to the Last Portion
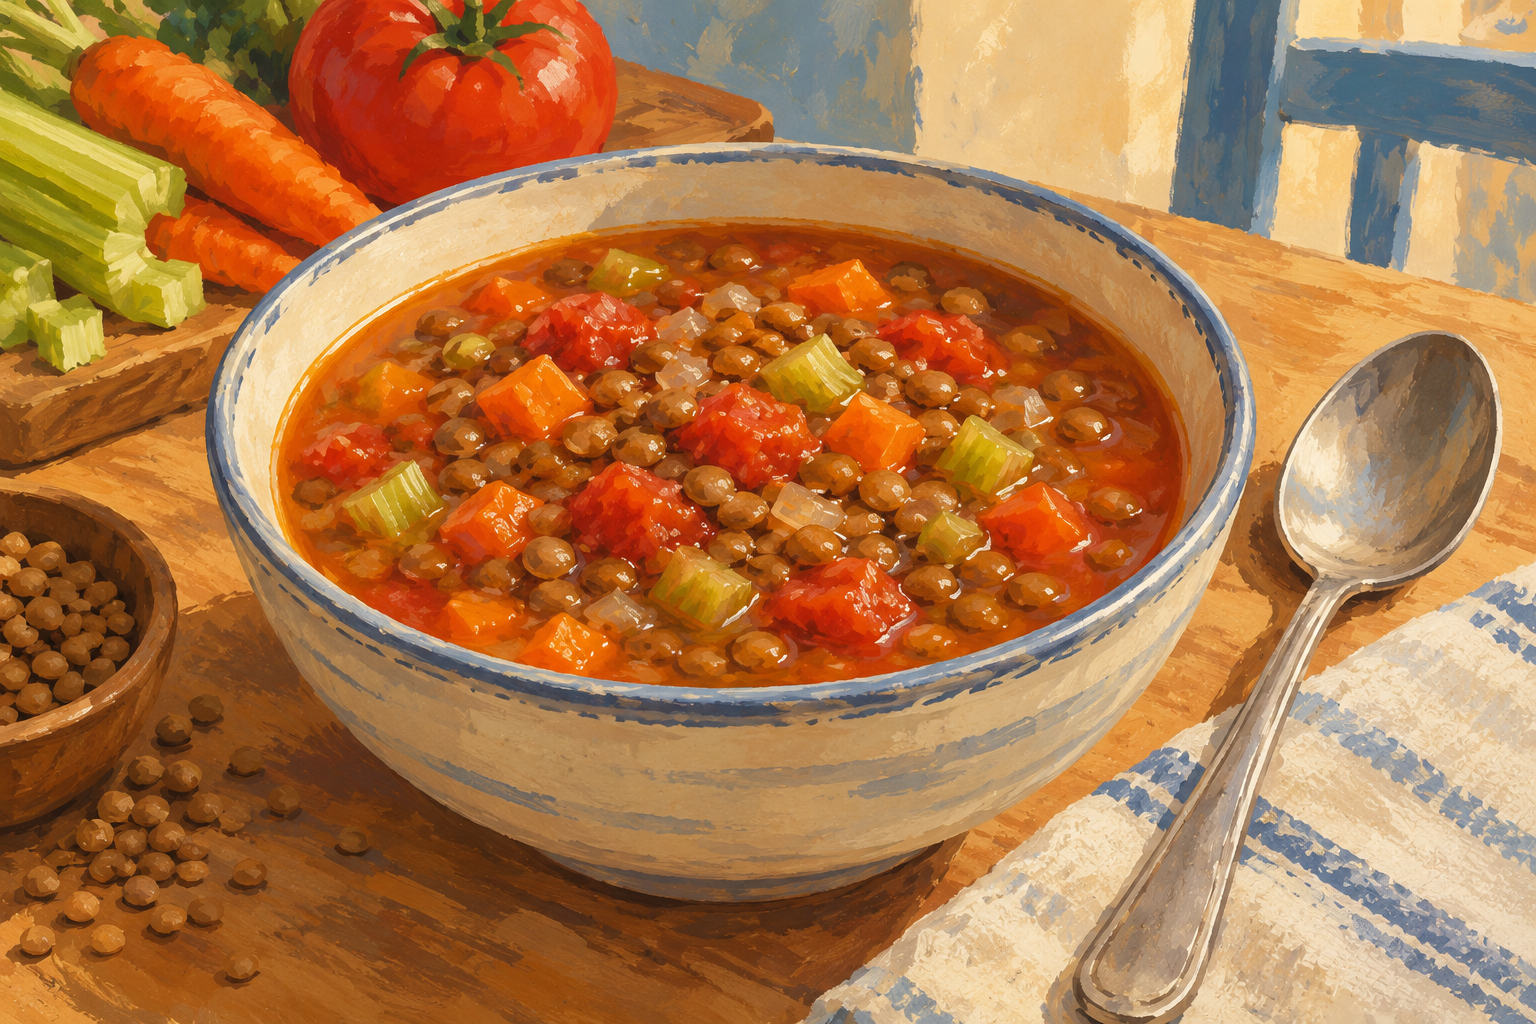
Illustration: a conceptual bowl of lentil and vegetable soup; not a photograph of an editorial kitchen test.
Recipes
Follow a source-based lentil soup recipe with clear stovetop cues, sensible substitutions, and USDA guidance for cooling and reheating.
A practical, source-based recipe
Lentil soup looks uncomplicated on paper: soften vegetables, add dry lentils and liquid, then simmer. The useful details are the decisions between those verbs. How small should the vegetables be? When is a simmer low enough? What does “tender” mean when lentils and carrots finish at different rates? How can a large pot be cooled safely, and what should change when the next-day portion has thickened? This guide answers those questions around one clearly attributed formula, without claiming that an editor cooked or tested it.
The recipe below follows the ingredient quantities and basic method published by Nutrition.gov under the name “Lentil Soup.” That page gives a yield of 11 servings, but does not define a serving volume or identify a lentil variety. Its linked source credits the National Heart, Lung, and Blood Institute, National Institutes of Health, and U.S. Department of Health and Human Services. The upstream link now leads to a general NHLBI page, so the verified Nutrition.gov recipe is the practical source to consult for the formula itself.[1]
The explanation adds observable cues, organization, and careful limits around substitutions. It cannot replace the original source, a package’s instructions, or a thermometer where food-safety guidance calls for one. Ingredient labels, pot shape, burner output, lentil age, and personal taste all vary. Use the quantities as written, follow the sequence, and judge doneness by the ingredients rather than by an exact minute on a clock.
At-a-glance recipe card
Yield: 11 servings, as stated by Nutrition.gov; the source does not state a cup measure per serving. Active preparation: not specified by the source. Simmer: at least one hour, or until the lentils are tender, as specified by the source. Equipment: a large soup pot with a lid, cutting board, knife, measuring cups and spoons, can opener if needed, stirring spoon, and heat-safe ladle. Dietary description: the cited formula uses vegetable broth and contains no listed meat; check every packaged ingredient and choose products that match the meal you intend to serve.
The main method is stovetop. The source tells the cook to soften carrot, celery, and onion in oil over medium heat; cook garlic, oregano, basil, and pepper for two minutes; add lentils, tomatoes, broth, and water; cover, bring to a boil, and then simmer at least an hour, until the lentils are tender. It does not specify added salt, a blender, garnish, or a pressure-cooker method. None is required to follow the source recipe.[1]
The amount of liquid is substantial: 6½ cups water plus 2 cups vegetable broth, in addition to the liquid in a 14½-ounce can of crushed tomatoes. A broad heavy pot can make stirring easier, but the source does not require a particular material or diameter. Choose a vessel large enough that ingredients and liquid remain well below the rim after boiling; leave room to stir without splashing. If the pot is close to full, do not force the boil. Move to a larger pot before heating, or divide the recipe evenly between two pots and keep an eye on both.
Ingredients
- 2 tablespoons olive oil
- 2 medium carrots, diced
- 2 medium celery stalks, chopped
- 1 small yellow onion, chopped
- 2 garlic cloves, minced
- 1 teaspoon dried oregano
- 1 teaspoon dried basil
- ½ teaspoon ground black pepper
- 2 cups dry lentils, sorted and rinsed
- 1 can crushed tomatoes, 14½ ounces
- 2 cups vegetable broth
- 6½ cups water
Method
- Sort and rinse the lentils under running water. Prepare the vegetables and measure the remaining ingredients before turning on the stove.
- Heat the olive oil in a large soup pot over medium heat. Add the diced carrots, chopped celery, and onion. Cook, stirring, until the onion is tender.
- Add the minced garlic, dried oregano, dried basil, and black pepper. Stir and cook for 2 minutes.
- Add the rinsed lentils and crushed tomatoes. Pour in the vegetable broth and water. Stir to distribute the ingredients.
- Cover the pot and bring the soup to a boil. Once it boils, reduce the heat to maintain a simmer. Cook for at least 1 hour, or until the lentils are tender. Stir occasionally and check the pot as it cooks.
- Taste when the lentils are tender. The Nutrition.gov recipe does not list salt; if you choose to season further, do so gradually at the table or near the end. Serve hot. Refrigerate leftovers promptly, using the USDA guidance later in this article.[1][2]
Editorial note: This is a source-based cooking guide, not a report of a kitchen test. Simmering behavior and total time can vary; the observable tender-lentil endpoint matters more than treating one hour as a guarantee.
Before you start: make the work easy to see
Read the ingredient list from top to bottom once before opening packages. Confirm that you have dry lentils, not a ready-to-eat can, because the formula and method are written for dry lentils. Check the can size and the amount of liquid. The recipe distinguishes 2 cups of broth from 6½ cups of water; measuring both before the pot starts boiling prevents a hurried estimate later. The vegetables are prepared in different ways: carrots are diced, celery is chopped, onion is chopped, and garlic is minced. Those words are useful because they set up the order and how the pieces behave in the soup.
Set out the cutting board, knife, measuring tools, can opener, pot, lid, and spoon. Place the measuring tools near the dry ingredients, and set the broth and water where they will not be confused with the oil. Keep the soup pot on a burner that supports its base. This simple layout reduces the chance of leaving garlic in a hot pot while searching for a can opener or having to measure water over a boiling pan. These are organization suggestions, not extra recipe ingredients or a claim about a tested kitchen setup.
Wash hands with soap and water before handling food. Wash fresh produce under running water before cutting it. The FDA says washing can reduce bacteria on produce but does not eliminate them, and advises against washing produce with soap, detergent, or commercial produce wash. Wash the knife, board, measuring tools, and hands after handling raw produce and before moving on to foods that will not be cooked. The recipe contains no raw meat, but clean tools still help keep preparation orderly and prevent dirt from being carried from one ingredient to another.[3]
Inspect lentils as you move them into a bowl or strainer. Dry lentils are agricultural products and can include debris. Remove visible stones or foreign material, then rinse and drain them. NDSU Extension describes dry lentils as needing no soak; its preparation directions also say to sort and rinse them. The recipe’s hour-long soup simmer is not the same as the shorter time NDSU gives for plain lentils cooked in water, because the Nutrition.gov formula includes tomato and other ingredients. Follow the complete soup method and the tenderness cue, rather than substituting a standalone cooking time for the recipe’s stated simmer.[4]
Choosing and handling the lentils
The Nutrition.gov ingredient line says “2 cups lentils (dry)” without naming brown, green, red, or another type. That is an important limit. A cook following the source can use dry lentils, but should not assume every product behaves identically. Whole lentils and split red lentils are distinct products. Lentils.org describes different typical cooking times for whole lentils and split red lentils, a reminder that variety and processing affect texture and speed. The soup source itself does not validate a red-lentil conversion.[1][5]
For this guide’s step-by-step discussion, think of whole dry lentils sold for general soup use. Read the package, and if it identifies a lentil as split or gives specific directions, do not assume that the exact one-hour formula will produce the same result. Split lentils may soften and break down sooner; the finished soup may be thicker and less distinct. That statement describes the broad distinction in product form, not a tested substitution for this particular formula. The original recipe remains the reliable point of reference for its own stated quantities and method.
Lentils do not require the soaking used for some other dry pulses, according to NDSU Extension and Lentils.org. Rinsing and sorting are still useful preparation steps. If the lentils have been stored for a long time, if their package gives a different instruction, or if they look unusual, consult the package and the source that applies to that product. Do not use smell, appearance, or a short clock time as a substitute for cooking dry lentils thoroughly.[4][5]
Measure dry lentils level in a dry measuring cup, unless the package specifies a weight and you choose to use it. The source recipe measures by volume, so its 2-cup quantity is what this article preserves. Do not pack the lentils down; a packed cup changes how much dry product goes into the pot. If there is a minor spill, sweep up the dry pieces before they reach the floor or a nearby drain, where they can become a slipping or cleanup nuisance.
Rinse the measured lentils in a fine-mesh strainer or bowl, moving them gently under clean running water. Let the water drain before adding them to the soup. Rinsing does not rehydrate them to a measured cooked volume, and this recipe does not call for pre-cooking. Do not drain or rinse the canned tomatoes: the source says to add the tomatoes, and the liquid in the can contributes to the soup. The source does not tell the cook to rinse the tomatoes or the dry herbs.[1]
Preparing vegetables at a manageable pace
The recipe uses a small onion, two carrots, two celery stalks, and two garlic cloves. Prepare each separately so the cut pieces can go into the pot together in their assigned stages. Dice the carrots into pieces small enough to fit comfortably on a spoon; chop the celery and onion into similarly manageable pieces. The source does not define a dice measurement, so avoid presenting one as a precise requirement. Aim for consistency within each vegetable rather than perfect uniformity across every ingredient.
Why take time with the cuts? Smaller, reasonably similar pieces are easier to stir and eat, and they are exposed to the hot liquid and pot differently than large chunks. That is a practical cooking observation, not a promise that all vegetables will become tender at the same moment. The recipe’s instruction is specifically to cook the first three vegetables in oil until the onion is tender, then add garlic and spices. The tender onion is a useful cue for that first stage; do not wait for the carrots to behave exactly like the onion before proceeding.[1]
Peel the onion and discard the papery skin and root end. Trim the carrot ends; peel the carrots if desired, then dice them. Trim any dry ends from the celery and chop the stalks. For garlic, remove the papery peel, trim the root end, and mince the cloves. If your knife skills are still developing, work slowly and keep fingertips curled back from the blade. A stable board and deliberate strokes matter more than speed.
The sequence keeps the garlic separate from the carrot, celery, and onion. This lets the onion become tender before the garlic enters the hot oil. The source gives garlic and dried herbs only two minutes of cooking before liquids are added. Keep the measuring spoon and the measured herbs nearby so the garlic does not sit alone in the pot while you locate the oregano or basil. Stir during that short aromatic stage and proceed to the lentils, tomatoes, broth, and water promptly.[1]
If a carrot is unusually large or small, the source’s quantity still refers to two medium carrots. Use judgment when selecting produce; do not compensate for a different size by adding a large amount of extra vegetable without also considering the pot’s liquid balance. The same applies to celery and onion. A recipe has a balance of solid ingredients and liquid. A substantial unmeasured addition can make the soup thicker, dilute the seasoning per spoonful, or require more cooking. Those are predictable possibilities, not outcomes measured in a test kitchen.
The first stage: warming the aromatics
Put the large soup pot on the stove and measure 2 tablespoons olive oil into it. Set the burner to medium heat. Let the oil warm; do not leave the pot unattended. Add the diced carrots, chopped celery, and onion. Stir so the pieces are coated and spread across the bottom. Cook and stir until the onion is tender. Nutrition.gov does not specify an exact number of minutes for this stage, so use the stated texture cue instead of inventing a timer.[1]
Medium heat is the source’s setting. Burner dials differ, so “medium” does not describe a universal surface temperature. If the vegetables begin to scorch or the oil smokes, reduce the heat and stir; if they barely move after several minutes, check that the burner is on and the pan is warming. The goal at this point is to soften the vegetables in oil, not brown them heavily or turn the onion crisp. Browning is not a step specified by the source.
Use the spoon to scrape the bottom gently and move pieces from the hotter center toward the edge, especially if your pot has a narrow base. A wooden or heat-safe spoon works. Keep the handle pointed away from the edge of the stove where someone might bump it. If the pot is light, hold the handle when stirring so the vessel does not slide. These are ordinary kitchen handling suggestions, not a new required appliance.
Once the onion is tender, add the minced garlic, oregano, basil, and black pepper. Stir them into the vegetables and cook for two minutes, as the source instructs. Keep the spoon moving often enough that garlic is not left in one hot spot. Dried herbs can release aroma as they warm, but the source does not claim that a particular smell is an exact doneness test. The two-minute direction is specific; prepare the next ingredients before beginning this short stage.[1]
After the two minutes, add the lentils and tomatoes, then pour in the vegetable broth and water. Scrape the bottom with the spoon to lift any bits of softened vegetable, and stir so that lentils are not collected in one mound. Check that the total liquid covers the dry lentils and vegetables. The recipe’s exact quantities are the best guide; resist adding extra water just because the mixture looks dense before it heats. Dried lentils absorb liquid as they cook, and the recipe intentionally has a long simmer.[1]
Bringing the pot to a boil, then lowering the heat
Cover the pot and bring it to a boil. Stay nearby during this transition. The soup contains water, broth, tomato, vegetables, and lentils; it may bubble up when heated. A full, vigorous boil is not the simmer stage. Once the surface reaches a boil, lower the burner to maintain a simmer, then keep the lid on as the recipe directs. A simmer has gentle, regular bubbling rather than the forceful rolling movement of a hard boil.
The distinction is practical: an unattended hard boil can send liquid over the rim, create a mess, and leave less liquid in the pot than expected. Lowering heat also makes it easier to stir occasionally without fighting aggressive bubbles. Stoves retain heat differently, so a small adjustment after lowering the setting may be necessary. Watch the surface for a few moments to see whether it has settled into gentle bubbling. The exact dial number is not transferable between cooktops.
The covered pot needs occasional attention. Lift the lid away from your face so steam does not rise toward it, then stir gently from the bottom upward. Check that lentils have not settled into a thick layer on the bottom, and that the soup is still simmering rather than boiling hard or sitting completely still. Return the lid promptly. University of Maine Extension calls for occasional stirring in its separate lentil soup recipe. Nutrition.gov’s method calls for covering and simmering; this guide uses occasional stirring to inspect the pot while following that covered simmer.[1][6]
Begin checking tenderness before the one-hour mark if the soup’s actual behavior suggests it is ready, and continue beyond an hour if the lentils remain firm. The published instruction is “at least 1 hour or until lentils are tender.” Both halves matter. One hour is not a guarantee that every lentil variety, package age, pot, or burner will finish at the same moment. Do not stop merely because the clock reaches an hour when the lentils are still hard in the center.[1]
To check, lift out a few lentils with the spoon and let them cool briefly before tasting. They should be tender throughout, not crunchy or chalky in the middle. Check more than one from different parts of the pot. Carrot tenderness is another useful eating cue, but the source makes lentil tenderness the explicit endpoint. Avoid tasting directly from a hot spoonful; steam and liquid can burn. This is a sensory cooking check, not a microbiological safety test for all possible hazards.

Reading texture and adjusting the method
Soup texture changes as it cooks. At first, the pot contains separate pieces and visible liquid. During the simmer, the lentils soften and the vegetables become easier to pierce. After the soup rests, the mixture may look thicker because the ingredients continue to absorb liquid and settle. The sources do not quantify this change for the exact recipe, so the practical question is whether the spoon moves comfortably and whether the finished bowl has the consistency you want.
If the surface stops bubbling after you reduce the burner, raise the heat a little and check again. If the soup is bubbling forcefully, turn it down. Make small adjustments, allow the pot to respond, and check the surface rather than repeatedly turning the dial. If liquid is getting low before the lentils are tender, add a modest amount of hot water or broth and continue simmering; the University of Maine Extension’s separate lentil soup recipe gives hot broth or water as a thinning option when necessary. That source uses a different set of quantities, including rice, so its instruction supports the general thinning option, not a measured amount for the Nutrition.gov formula.[6]
If lentils are still firm, continue cooking and keep the pot covered at a simmer. Do not assume the batch has failed after one hour. If the liquid appears low, check whether the heat was too high or the lid was loose, then add hot liquid a little at a time. A large splash can move the result from thick soup to thin broth quickly. Stir and wait before deciding whether more is needed. Because this exact formula has not been kitchen-tested by the editorial team, no claim is made that a particular added quantity fixes every pot.
If the soup looks thin when the lentils are tender, first ladle a portion into a bowl and let it stand briefly. Decide whether the consistency is actually a problem in the serving bowl. If you prefer a thicker texture, mashing some tender lentils against the inside wall of the pot with the spoon is a low-equipment option; it changes texture without adding an unverified ingredient. This is an optional serving adjustment, not an instruction from the Nutrition.gov recipe. Do not puree a hot pot in a countertop blender: that tool and step are not part of the source formula, and hot-liquid handling would require separate equipment guidance.
If the soup is thicker than you prefer, add hot water or broth in small increments and stir. The University of Maine Extension source uses additional hot broth or water to thin a different lentil soup. Apply the idea cautiously: the source formula here contains a specific amount of liquid, and adding too much can dilute its flavor. A small amount followed by a pause gives you a chance to judge. Record the change if you are intentionally adapting the recipe so the next batch can be adjusted deliberately rather than by memory.[6]
Seasoning without changing the source formula
The Nutrition.gov list includes dried oregano, dried basil, and black pepper, but does not list salt. Preserve that distinction. Broth and canned tomatoes vary in salt content, so tasting after the lentils are tender is more informative than assuming every brand will need the same amount. If you choose to add salt, start with a small amount, stir it through, and taste again. Do not label an exact added salt quantity as part of the published source recipe.[1]
The recipe also does not specify chili flakes, cumin, lemon, vinegar, sugar, bouillon, or garnish. Adding one of these may produce a pleasant personal variation, but it is an adaptation rather than a verified version of the source. If you experiment, change one element at a time and write it down. That makes it easier to know what created a difference. Because the article must not imply kitchen testing, these are suggestions for a reader’s own optional experimentation, not recommendations based on a trial by the editorial team.
Broth deserves special attention because its flavor and saltiness vary by product. The source specifies vegetable broth. Read the package and use the amount listed, 2 cups. If the label describes concentrated broth or a product that must be diluted, follow its package directions for preparing the amount required. Do not use a concentrate straight from the jar in place of prepared broth unless the label says that is how it is used. Such a substitution would change the formula’s liquid and seasoning balance.
The can of crushed tomatoes contributes tomato flavor and liquid. A can of diced tomatoes is not exactly the same texture, and tomato paste is much more concentrated; neither is a source-listed equivalent. If the exact crushed product is unavailable, choose a replacement only after considering its form and label directions, and describe the result as an adaptation. Adding tomato earlier or later can also affect how quickly lentils soften: NDSU Extension notes that acidic ingredients such as tomatoes may slow lentil cooking. The source recipe adds tomatoes before the long simmer, so simply allow for the stated tenderness check rather than promising a fixed time.[4]
Serving the soup
Serve the soup hot once the lentils are tender and you are satisfied with the texture. Stir from the bottom immediately before ladling so the lentils and vegetables are distributed between bowls. The published yield is 11 servings, but Nutrition.gov does not specify a volume per serving. Do not assume that each portion equals a particular number of cups. If exact portion sizes matter for a household, ladle into the intended bowls or containers and measure them once; that measurement describes your batch, not the source’s serving-size statement.[1]
Nutrition.gov suggests whole-grain bread for dipping. That is an optional serving suggestion, not an ingredient needed to cook the soup. A side of bread can make the meal feel more complete, while a smaller bowl can work as a starter. The choice does not change the recipe’s yield calculation. If serving a group, place a ladle in the pot and use a heat-safe trivet or stable surface. Keep the handle of the pot and ladle away from the table edge and from children’s reach.
Keep hot food hot if it will sit out for service. USDA FSIS says hot food should be kept at 140°F or warmer. For a meal that will last longer than a short serving period, consider serving smaller quantities and replenishing from the pot rather than leaving the full pot out. Do not leave perishable food at room temperature for more than two hours, or more than one hour when the surrounding temperature is above 90°F. The one-hour rule is relevant to hot outdoor gatherings; it is not a reason to leave food unrefrigerated longer indoors.[2]
If you are serving people with different preferences, season individual bowls rather than adding a large amount of extra seasoning to the full pot. That keeps the base formula intact and allows each person to decide. Clearly identify the soup as prepared with vegetable broth if that is what you used; “vegetarian” depends on choosing a broth and any additions that fit the diners’ needs. Do not promise that a packaged broth is free from an allergen or suitable for a medical diet without checking its label and the person’s requirements.
Substitutions and sensible limits
The source recipe itself allows vegetable broth, and this guide keeps that choice. If the package or household preference requires a different prepared broth, that is a meaningful adaptation; broth can carry salt and flavor, so taste near the end and avoid assuming the result will match. The recipe’s written quantities still call for 2 cups broth plus 6½ cups water. Choosing a more concentrated liquid or replacing all the water with broth changes the flavor and salt profile and is not a tested equivalence.
The Utah State University Extension “Create a Soup” guide presents a flexible framework that includes fresh, canned, or frozen vegetables in its soup-building method. It supports the general idea that different vegetable forms can be used in a different soup framework. It does not validate a one-for-one substitution in this Nutrition.gov lentil recipe. Frozen diced carrots or celery may soften differently, and canned produce may add liquid or salt. For a source-faithful version, use the quantities and forms listed above. If adapting, make a clear note of the change and use observed tenderness rather than assuming the original timing applies.[7]
Do not replace the dry lentils with canned lentils one-for-one. Canned lentils are already cooked, while the source recipe’s hour-long simmer is designed around dry lentils. Lentils.org describes canned lentils as a time-saving option in general and recommends rinsing them, but does not say that this specific recipe can be converted by an equal-volume swap. A canned-lentil soup would need a separately verified formula with changed liquid and timing. This article therefore leaves that adaptation out rather than inventing a conversion.[5]
Likewise, do not add rice, pasta, meat, or large extra portions of vegetables and assume the source yield or simmer stays the same. The University of Maine Extension has a different lentil soup with rice and different quantities. It can illustrate that lentil soups exist in multiple forms, but its 45-to-55-minute simmer does not override the source recipe’s one-hour-or-tender endpoint. An ingredient that absorbs liquid or requires a different cook time changes what the pot needs. For a dependable first attempt at this formula, follow it as written.[1][6]
Food safety from sink to stove
Clean hands, produce, utensils, and surfaces before preparation. FDA guidance says to wash produce under running water before cutting or eating it, including produce with skin that will be discarded. Soap, detergent, and commercial produce wash are not recommended for produce. Washing can reduce bacteria present on the surface but does not eliminate them; cooking produce thoroughly reduces the risk of illness. These directions support careful handling, not a guarantee that any ingredient is sterile.[3]
Keep the work area clear enough to avoid setting cleaned vegetables back onto a surface that held unwashed produce. Use a clean spoon for tasting; do not return a tasted spoon to the pot. Let a sample cool before tasting it, and wash hands after handling trash, dirty packaging, or other contaminated surfaces before returning to food preparation. The soup contains no raw poultry or meat, so this recipe avoids those specific steps, but cleanliness still matters for vegetables, cans, utensils, and storage containers.
The recipe does not provide a food thermometer temperature for the original vegetable soup. Do not invent one. Its cooking endpoint is that the lentils are tender after a covered simmer of at least one hour. The USDA temperature of 165°F in this article applies to reheated leftovers. FSIS also says soups and gravies should be brought to a rolling boil when reheating. These are storage and reheating instructions, not a requirement to put a thermometer into the original pot of vegetable soup.[1][2]
When opening the tomato can, inspect it and the contents as you normally would for packaged food, and follow the manufacturer’s handling advice. Do not use a can that is badly damaged or leaking. This general caution does not replace official guidance for a specific product recall. If an ingredient has been recalled or has a safety notice, follow the official instructions for that notice rather than trying to cook the issue away.
Cooling and storing a large batch
A pot containing 11 servings should not be treated like a single small container when it is time to refrigerate it. USDA FSIS explains that a large pot of soup can take a long time to cool. Divide the soup into shallow containers so it cools more quickly. Hot food may go directly into a refrigerator, or it can be rapidly chilled in an ice or cold-water bath before refrigeration. Place leftovers in the refrigerator within two hours after cooking or removal from a warming appliance; if the room temperature is above 90°F, refrigerate within one hour.[2]
Use containers that are clean, shallow, and manageable to lift. Divide the soup while it is still easy to portion, and avoid filling one deep container to the top with the entire batch. Leave enough space to close the lids securely and keep containers level while moving them. Label them with the date so you can track how long they have been stored. These are practical ways to apply USDA’s advice on rapid cooling and storage; the source does not prescribe a particular container size for this recipe.[2]
Do not wait for the pot to reach room temperature before refrigerating it. The FSIS guidance explicitly allows hot food to be placed directly in the refrigerator. The important goal is prompt cooling, and shallow portions help. If the refrigerator is crowded, make room before cooking or prepare a clean ice bath option. Avoid leaving the whole pot on the counter while you eat and clean up; the two-hour window begins when the food was cooked or removed from hot holding.[2]
Keep the refrigerator at 40°F or below, as FSIS directs. USDA says leftovers can be refrigerated for three to four days or frozen for three to four months. The frozen period is about quality; FSIS notes that frozen food can remain safe indefinitely, though moisture and flavor may decline over longer storage. Date the containers and use the shorter refrigerator window. If you do not expect to eat the soup within that time, freeze it promptly rather than waiting until day four to decide.[2]
Soup thickens as it sits, so a chilled portion may not look like the freshly ladled bowl. That change alone is not a safety signal or a reliable guide to how long it has been stored. Keep track of time and temperature, not just appearance or smell. When reheating, add a small amount of water if the texture is too thick, then stir well and heat evenly. This is a serving adjustment; it does not extend the safe storage window.
Reheating safely and evenly
Reheat only the amount you plan to serve when practical. For soup, USDA FSIS says reheated leftovers should reach 165°F as measured with a food thermometer, and sauces, soups, and gravies should be brought to a rolling boil. Stir the pot so that cooler portions from the edges and bottom move through the hot liquid. Check the temperature in more than one place if using a thermometer, especially when reheating a large portion. Follow the thermometer’s instructions for placement and cleaning.[2]
On the stovetop, transfer the portion to a saucepan, cover it, and heat over medium or medium-low, stirring regularly. If the soup is very thick, add a little water and stir before heating further. Bring it to a rolling boil, then serve. The time needed depends on portion size, pot, burner, starting temperature, and whether the soup is frozen or refrigerated. The article therefore gives a safe endpoint, not a made-up reheating time. Avoid walking away while the soup heats; thick foods can warm unevenly and stick at the bottom.
In the microwave, place soup in a microwave-safe glass or ceramic container. Cover it with a microwave-safe lid or wrap, venting the cover so steam can escape. Stir and rotate during heating because microwaves can leave cold spots. FSIS advises checking leftovers in several places with a food thermometer until they reach 165°F, and bringing soup to a rolling boil. Allow a brief rest, use care when removing the cover, and keep your face and hands out of the rising steam.[2]
Frozen soup can be reheated without thawing in a saucepan or microwave, according to FSIS, but it will take longer. If thawing first, use the refrigerator, cold water, or microwave rather than leaving soup on the counter. USDA guidance says leftovers thawed in the refrigerator should be used within three to four days or can be refrozen; cold-water thawed foods should be cooked before refreezing; microwave-thawed food should be heated to 165°F before refreezing. For a simple meal, thawing in the refrigerator and reheating one portion is easiest to track.[2]
Do not use a slow cooker to reheat cold leftovers unless current safety guidance specifically supports the process. FSIS’s instructions for reheating soup point to the stovetop or microwave and a rolling boil. A slow cooker’s gradual warming is a different process from keeping already-hot food hot. Use it only according to its food-safety directions, and do not confuse a recipe’s possible future adaptation with the verified method here.[2]

Common questions
Do lentils need to soak first? NDSU Extension and Lentils.org say dry lentils do not require soaking. This recipe does not include a soak. Sort and rinse the dry lentils, then add them to the pot as directed. If the package gives specific directions for a specialty product, read them; this article is based on ordinary dry lentils and the Nutrition.gov formula.[4][5]
Which lentils does the recipe require? Nutrition.gov only says “lentils (dry)” and does not name a type. Do not claim that it was written specifically for red, brown, green, or black lentils. Whole and split products cook differently. If you choose a variety with its own package instructions, use the tenderness check and be prepared for the texture to vary. The recipe has not been converted to split red lentils.[1][5]
Why are no salt measurements listed? The Nutrition.gov ingredient list does not include salt. Broth and tomatoes vary. The clearest source-faithful approach is to taste when the lentils are tender and decide whether the bowl needs any additional seasoning. Add gradually and note your own amount if you want to repeat the change. Do not mistake an optional personal adjustment for the cited formula.[1]
Can I use frozen vegetables? Utah State University Extension describes fresh, canned, or frozen vegetables in its flexible soup framework. That does not test frozen vegetables in this specific formula. The source recipe lists fresh carrots, celery, and onion. If you use another form, expect that texture and liquid may vary, and make a note of the change.[7]
How long do leftovers keep? USDA FSIS says cooked leftovers can be refrigerated for three to four days or frozen for three to four months. Refrigerate within two hours, or within one hour above 90°F, and cool a large pot in shallow containers. Track the storage time; appearance and smell alone cannot validate safety.[2]
What temperature should reheated soup reach? FSIS says leftovers should reach 165°F as measured with a food thermometer, and soup should be brought to a rolling boil. Stir and check for cold spots, particularly after microwave heating. The original vegetable soup recipe does not specify that temperature as its cooking endpoint; it is reheating guidance.[2]